
Create Collections in Shopify
Creating categories, also called collections in Shopify, is easier than you think. With the following tips and tricks, you will become a pro.
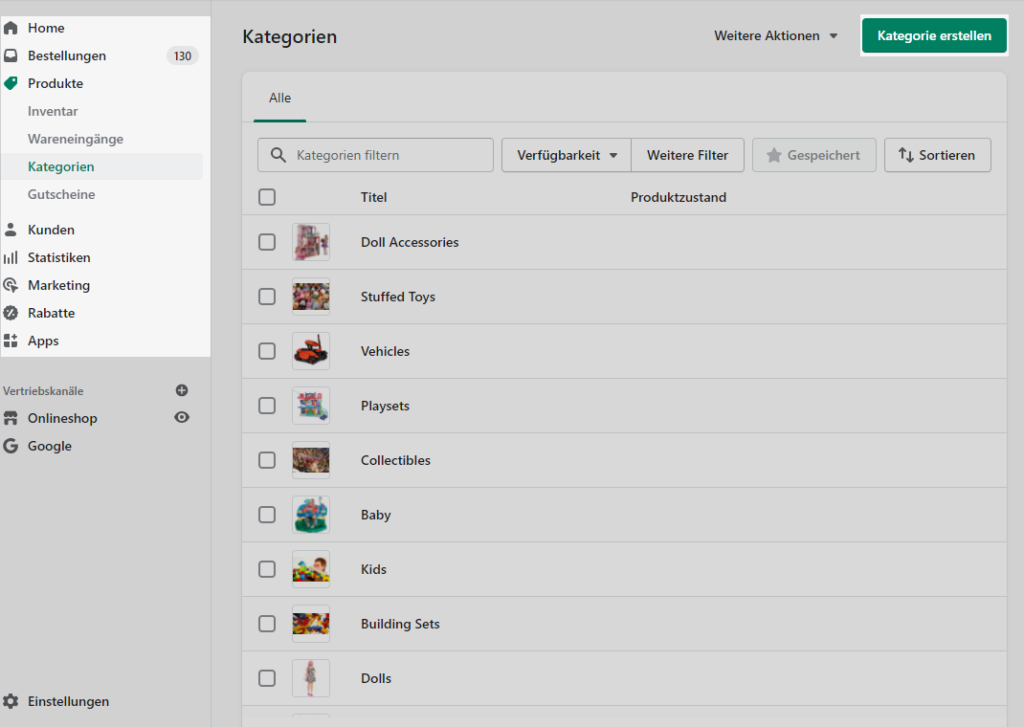
To create a collection, navigate to the “Products” item in the Shopify admin area on the left and under “Products” -> “Collections”.
There you will find a green button labeled “Create Collection”. Click on it.
In the collection detail view you will then see all the fields and options of the collection.
Collection overview – create collection (top right)
Title
This is the name of the collection.
Description
Here you can insert the description of the collection.
Videos / images or HTML elements can also be used.

Collection availability
In this section you can specify on which sales channel the collection should appear. If no sales channel is selected, the collection is not visible anywhere, i.e. at least “Online store” should be selected.
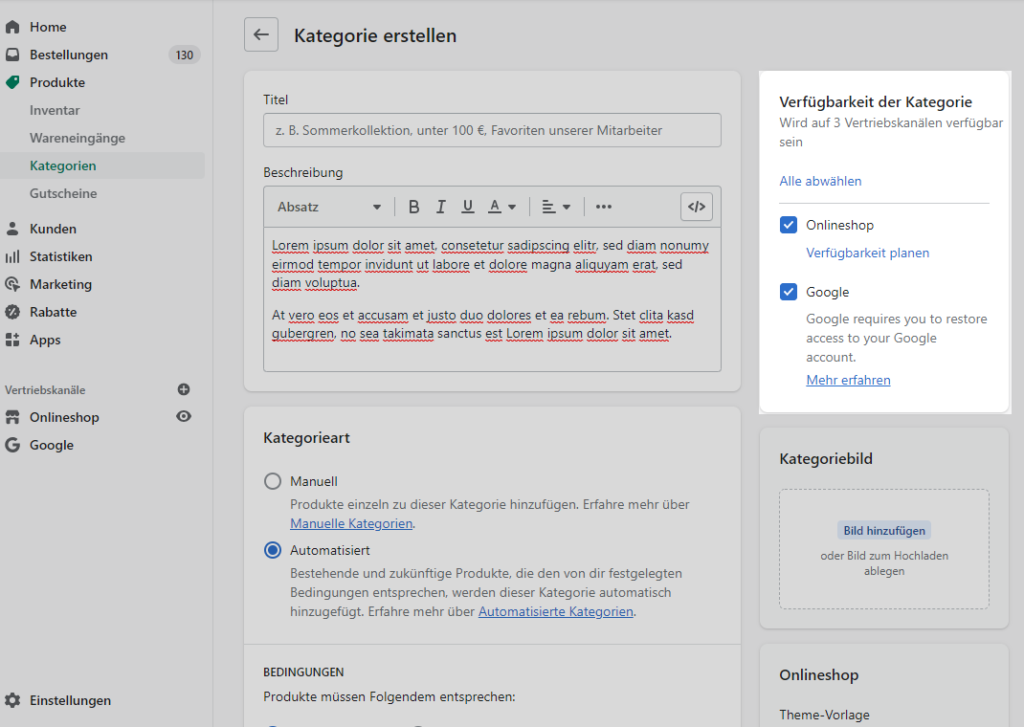
Collection image
Here you can upload an image for the collection. How and where this image will be used (and in which size) depends strongly on your store theme.
Online Shop (Theme Template)
A theme template can be selected to give the collection a different design. However, for this, an alternative template must be present or created in your Shopify themes.
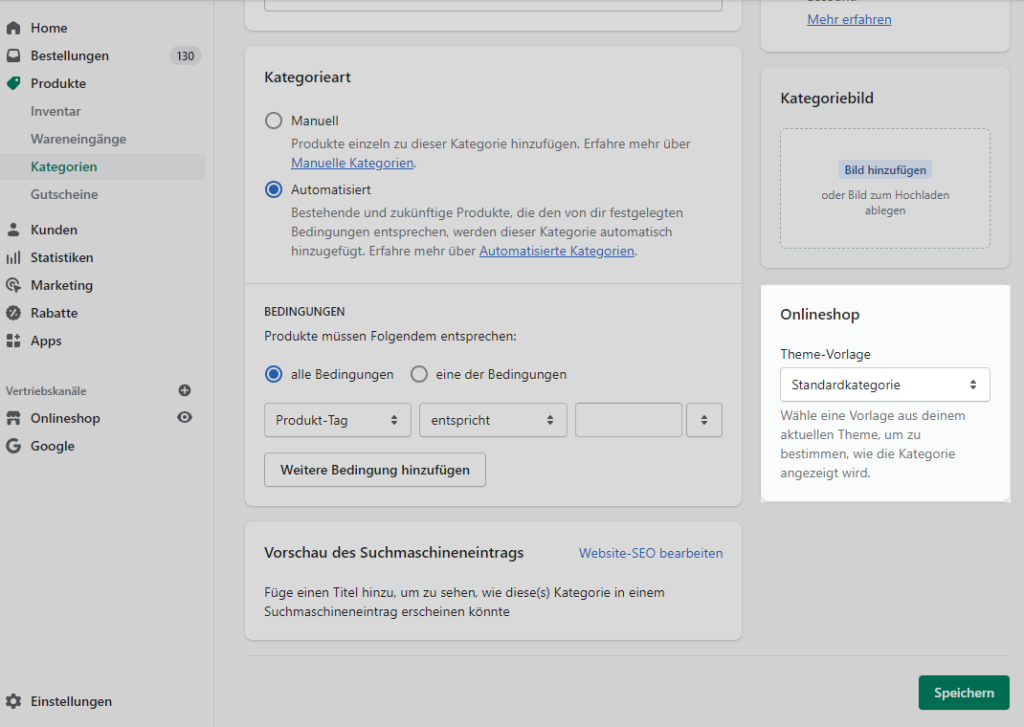
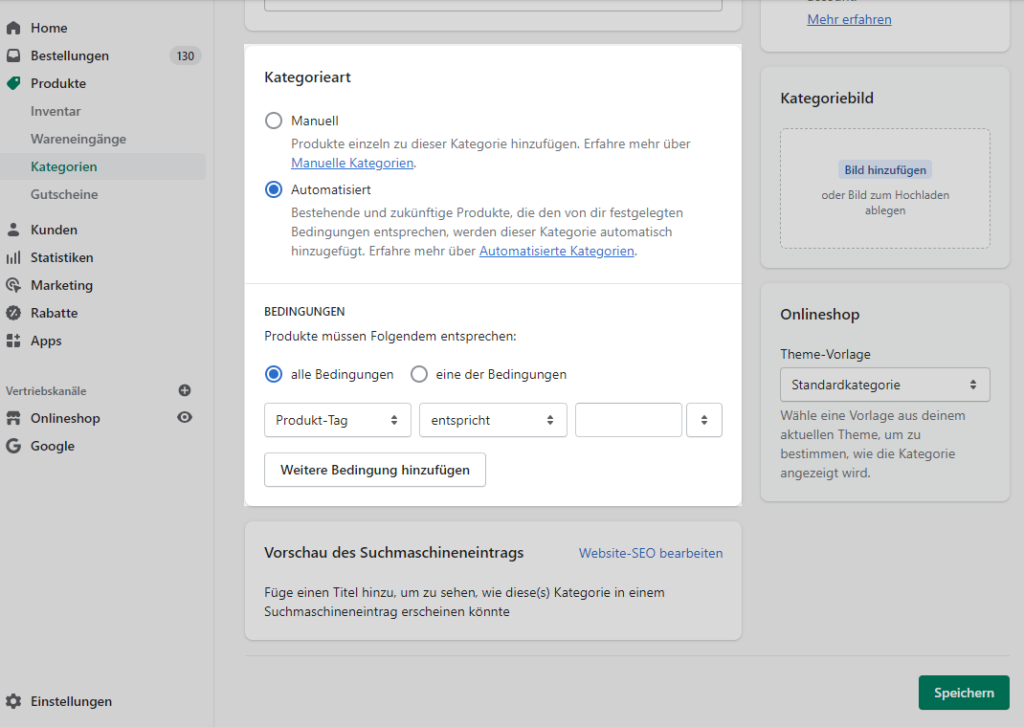
Collection Type
In Shopify there are two different types of categories. One is the manual category, where you have to assign each product to category individually. This would be the classic way, like WooCommerce (WordPress) or even xt:Commerce do it.
The other & in our opinion better way would be the automated categories. With automated categories, products are automatically assigned to categories based on conditions.
For the automated categories, you can control the conditions based on product type, product title, product tags, price, and more.
In addition, you can also link conditions so that all must be met or so that only one condition must apply. We always recommend to use the automated categories, because you can’t easily adjust them later on.
Shopify’s Automated Collection Assignment – Example 1:
For a fashion store that sells watches, rings and other jewelry, each watch will be given the product tag “Uhr”, which will then lead to the display in the collection:
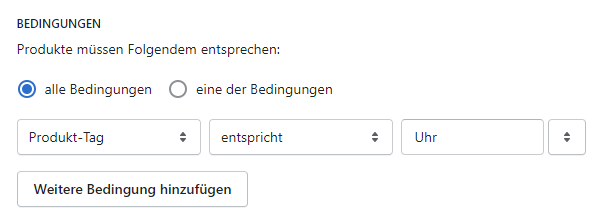
This would ensure that only products tagged “Uhr” show up in the watches collection .
Shopify’s Automated Collection Assignment – Example 2:
It should display all products that have a special price in a separate collection:
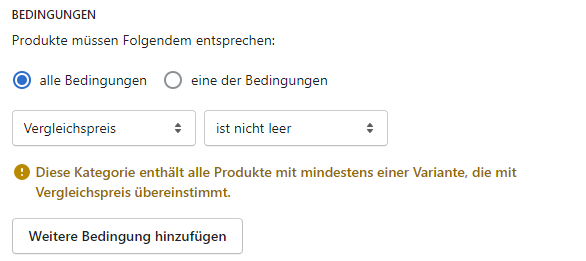
Here we would choose the “Comparison price” condition and if this value is not empty, it means that the product is on offer. Thus, all products with special price would be listed.
Shopify’s Automated Collection Assignment – Example 3:
All rings and chains should be listed in one collection:
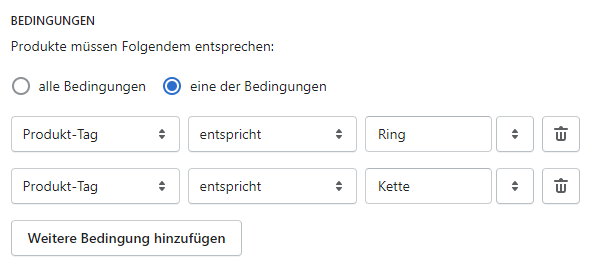
Two conditions were created and queried about whether at least one of the conditions applies. In this case, all products with the tag “Ring” OR “Kette” would appear in the category.
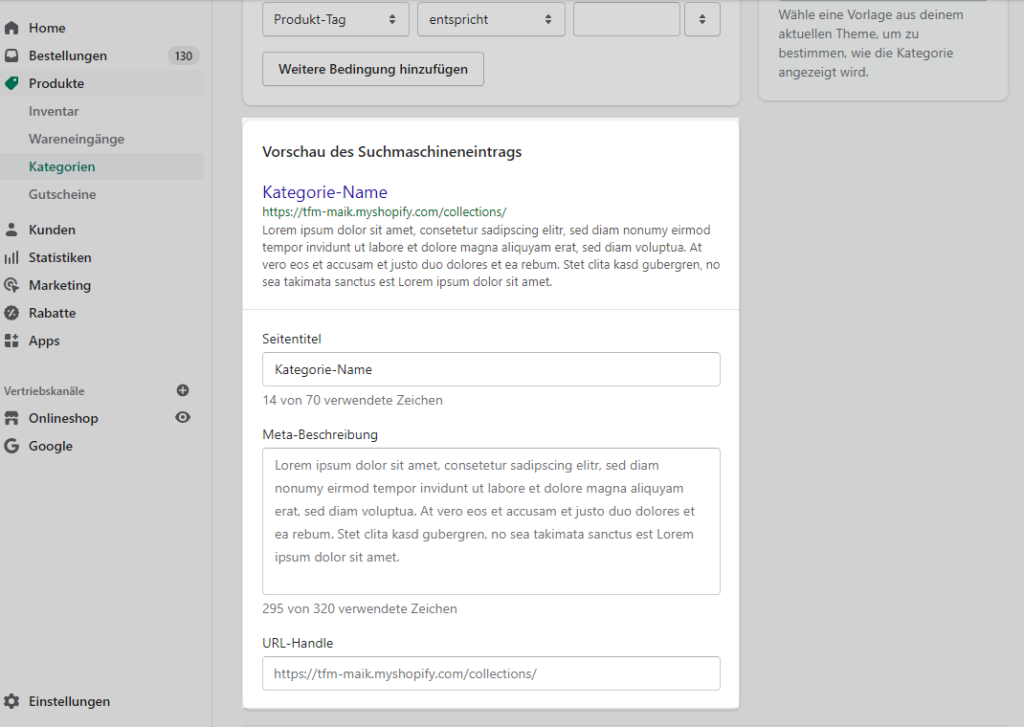
Preview of the search engine entry
To customize metadata such as the page title or category meta description, click “Edit Website SEO” in the area.
Here you can enter the desired values.
Otherwise, the collection name is taken for the title and an excerpt from the collection description for the meta description.
After everything is set, don’t forget to finally save your adjustments.
For more information on this topic, see the Shopify documentation.